Appendix B — Recording data in the field
Recording field data in a regularised format helps ensure that consistently high standards are kept. Well-structured and complete soil profile descriptions are key supports for subsequent analytical work, including mapping tasks and analysis of laboratory data.
B.1 Data entry forms
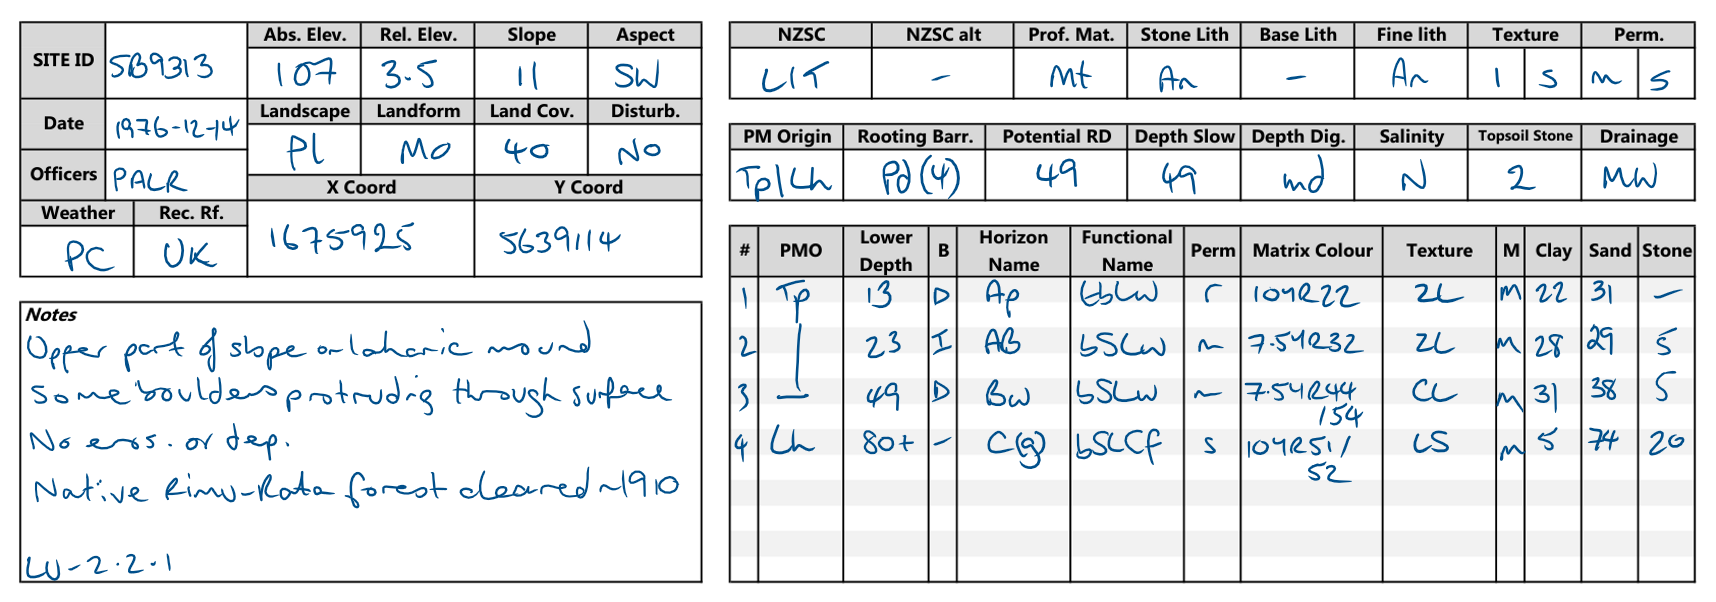
Using a data entry form reduces the chance of forgetting to record particular data points, vs freehand notes. The consistent layout also makes it easier to review data for completeness and correctness, and compare sites.
Data entry forms should be laid out so that the process of filling them out roughly follows the process of field soil description itself. Each section should contain enough room for the parameter being recorded. A high-detail hard-copy field sheet should still fit on a single A4 page, despite the large number of potential parameters.
Forms can be deployed on paper, but they are vulnerable to wind and rain. Note-taking software on touchscreen tablets (e.g. Microsoft OneNote) can offer a robust alternative.
B.2 App-based data entry
Using a purpose-built app for data entry can reduce the double handling inherent to recording hard-copy data, freeing up office time. Apps do come with design, deployment and maintenance overheads that need to be taken into account, as well as a significant learning curve for paper-adapted users. Graphical user interfaces, despite their huge potential, can at the time of writing be surprisingly restrictive about layout and input options, and generally will take up more virtual ‘page space’ than a hard-copy sheet.
At the time of writing there is no consumer-grade app dedicated to recording New Zealand soils field data, but the ESRI and QGIS spatial software ecosystems have field data entry frameworks that can be adapted for soils fieldwork.
B.3 Taking and managing photographs
Site photographs provide a valuable record of the profile itself and the nature of the landscape in which it occurs. Photographs taken should include at least the following:
- 1-4 landscape shots from different angles, placing the site in context. Stand well back and where possible, slightly uphill. Try to capture reliable landmarks in the background.
- 1 clear photo of the ground condition around the profile, including a measuring tape or stick for scale.
- 1 clear photo of the extracted profile or exposure with a measuring tape for scale. Ideally take this photograph before describing the profile, so it can be viewed in a minimally disturbed state.
- 3-4 closeup photos of the profile, capturing 30-40 cm depth ranges. These should slightly overlap.
Consider the use of a small whiteboard to include the site identifier and date in at least the profile photo. Any further photos of e.g. concretions or other distinctive soil features are optional.
Profile photographs should be taken in clear sunlight with the light behind the photographer, or in full shade. Avoid dappled or dim light, or angled shadows. Note that high-visibility clothing can sometimes reflect light onto profiles in a way that distorts colour.
Using a dedicated field data recording app to take photographs can ensure that they are always associated with the correct site identifier. Otherwise, photographs should be organised on a per profile basis as soon as possible after fieldwork. The quickest method is simply to place them in a folder named after the site identifier. Renaming image files and/or adding subject-matter tags can be useful for longer-term storage, but the process can be time-consuming.
B.3.1 Photographic equipment
Most users will default to their smartphone camera. This is usually safe, but some newer models default to enhancing photos in ways that are optimised for recreational use rather than scientific data recording. Users should make an effort to understand how their devices are processing photographs and disable any features that may alter the images too heavily.
