Graphical User Interface (GUI)
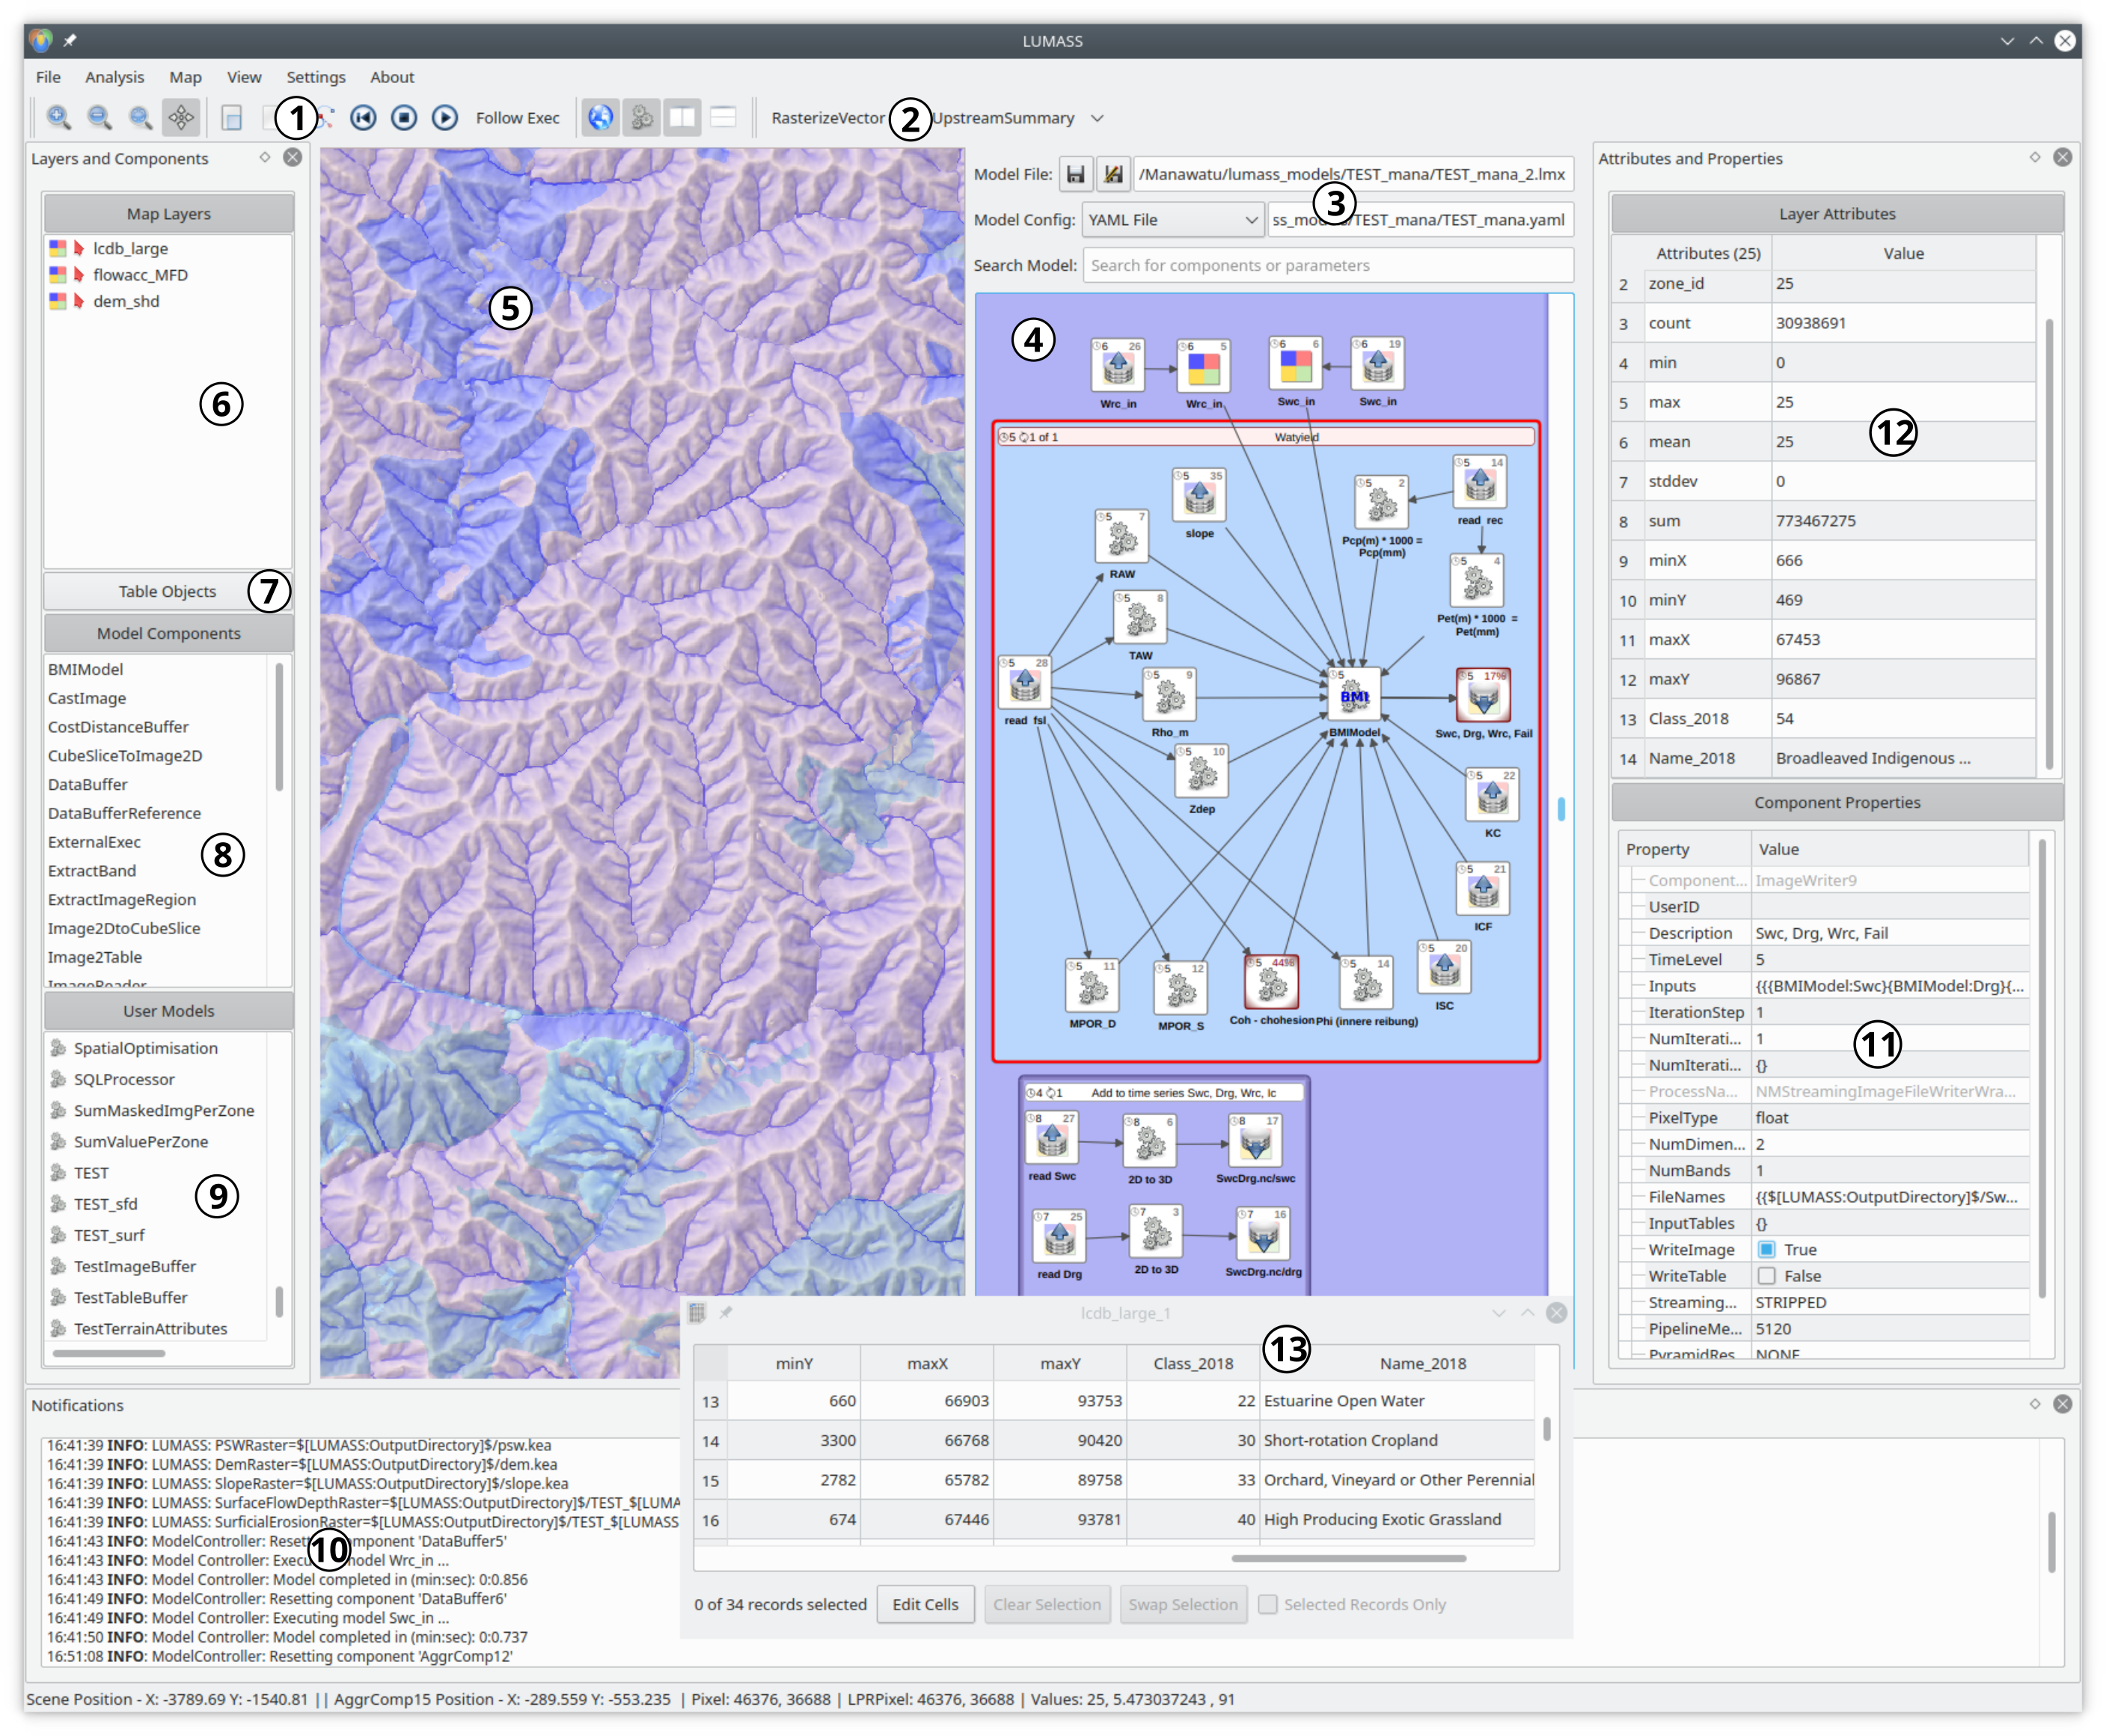
- Main Toolbar (s. below)
- User Tools: Tools created from LUMASS models
- Model Config & Search: Model file load and save, model configuration, and component search
- Model View: Visual modelling environment
- Map View: 2D/3D Display area for raster and vector layers as well as for point clouds
- Map Layers: Table of contents and legend configuration for layers displayed in the map view
- Table Objects: Table of contents for stand-alone tables (s. Table view)
- Model Components: List of available model components in the modelling environment
- User Models: List of models stored in the
UserModelsfolder (Settings » Configure Settings …) - Notifications: Info, warn, and error messages related to processing and modelling tasks
- Component Properties: Properties of a given model component
- Layer Attributes: List of map layer attribute values for a given point in the map (view)
- Table View: Table display and processing interface
LUMASS provides a typical desktop user-interface that embraces the use of drag and drop and context menus. If you want to accomplish a certain task and are in doubt of how to do it, try drag and drop, for example to import a table, image, or model into the respective view areas. If you want to perform an action on a particular object, e.g. map layer, table column, or model component, double check whether it provides a context menu (right click) offering object specific actions, such as table operations or executing model components. The user interface can be adjusted to best suit the current task at hand (i.e. mapping, or modelling). For example, the main views (GUI: 1,2) can be individually hidden and displayed (Tool bar: 12,13), adjusted in their size (by using their separating slider), or stacked vertically or horizontally (Tool bar: 14, 15). The display areas left and right of the main views (Layers & Components and Attributes and Properties, GUI: 5-9), as well as the notification area (GUI: 10) are dockable windows and can be arbitrarily positioned around the centred main views or float on top of the main user interface. Layer attribute tables and stand-alone tables (GUI: 13) are displayed in their own top level window independent of the main user interface. The individual content and property display areas (GUI: 5-9) can be collapsed and unfolded individually by clicking on their respective title button showing their name (e.g. Table Objects, GUI: 7). The View menu provides the presets ‘Map View Mode’ and ‘Model View Mode’, which configure the associated display areas for mapping and modelling tasks respectively.
Main Toolbar

- Zoom in map/model view
- Zoom out map/model view
- Zoom to map/model content
- Pan map/model
- Select model components
- Clear selection (features/components)
- Link model components
- Reset model
- Stop model execution
- Execute model
- Follow model execution (auto focus on executing component)
- Display/hide map view
- Display/hide model view
- Stack main views horizontally
- Stack main views vertically
Model Config & Search

- Save active model (current filename)
- Save model as …
- Active model filename
- Configuration context selector (None, Model’s YAML, <UserTool>, YAML File)
- Model configuration file path (*.yaml, *.ldb)
- Model component/parameter search
Saving and Loading Models
Models can be saved under the current filename (Model Config: 1,3) or under a new filename (Model Config: 2). LUMASS models are stored in two separate files. The structure of the model, including all configured parameters, is stored in a XML-based text file (*.lmx). The visual representation of a model as seen in the modelling environment is stored in a binary file (*.lmv). Both files are always saved automatically, regardless of whether the ‘lmv’ or ‘lmx’ file ending is used when saving a model. Equally, when loading a model into the modelling environment, either by using the context menu (‘Load Into …’) or by dragging a model from a file explorer into the environment, using either the ‘lmv’ or ‘lmx’ file works. Any model components (GUI: 8), UserModels (GUI: 9), or externally saved model files (*.lmx, *.lmv) dragged or loaded (context menu) into the modelling environment are added (copied) into the currently edited model.